

Welcome to “Showcase Upgrade #2” or
“Old buildings are crazy like that” or
“Why the hell did I ever learn how to solder”…
I post this under the random category because, unlike the Detolf Upgrade, this is by no means a tutorial. I can’t explain half the lighting stuff we were doing but in case you’re interested in that: Leave a comment, I’ll get my bf to explain that for you.
Up to this date it actually pains me that I never got around to taking a photo of the showcase how it originally looked like. 2 years ago, when I had moved into this apartment, I would have never thought about taking a photo of an ugly thing like that. But I saw the potential and this post is about what I did with it. Google, though, provided me with a picture that comes pretty close:
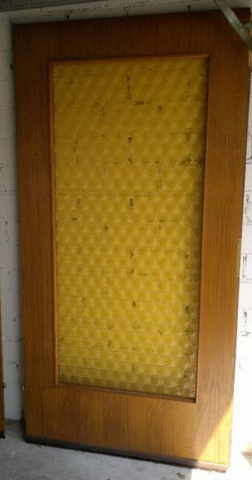
That’s…ugly. Dark brown wood with yellow almost non-seethrough glass. Reminded me of a 90-year old grandma collecting tiny porcelain figures. That needed to change!
I could have just thrown it away right? Replace it with a new showcase. Well, remember the alternate title “Old buildings are crazy like that”? My hometown is pretty medieval, most of the houses are extremely old and gone through quite a lot of change. The floor on which I live used to be one big apartment. Over time it was divided into 2 separate ones and the overall structure was altered, too. Our living room used to be 2 bedrooms. Combining them into one left it with 2 doors and no one needed that. So someone went along and changed the 2nd door into a showcase. So yeah… my showcase is integrated into the wall.
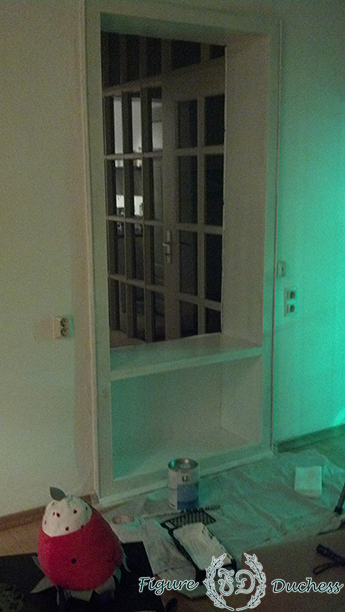
This is already a huuuge step into the upgrade process.
The plan was to throw out the old showcase doors, remove a huge portion of the backboard, paint everything white and close it up with glass and glass doors. In this picture we already cut out the back and I was in the middle of painting it.
My landlord was pretty cool with this. Of course, we told him about our plans beforehand and he even agreed to paying for the glass and paint. I’ve never seen the glazier’s bill and I’m pretty sure I don’t even want to.. Must have been so expensive…

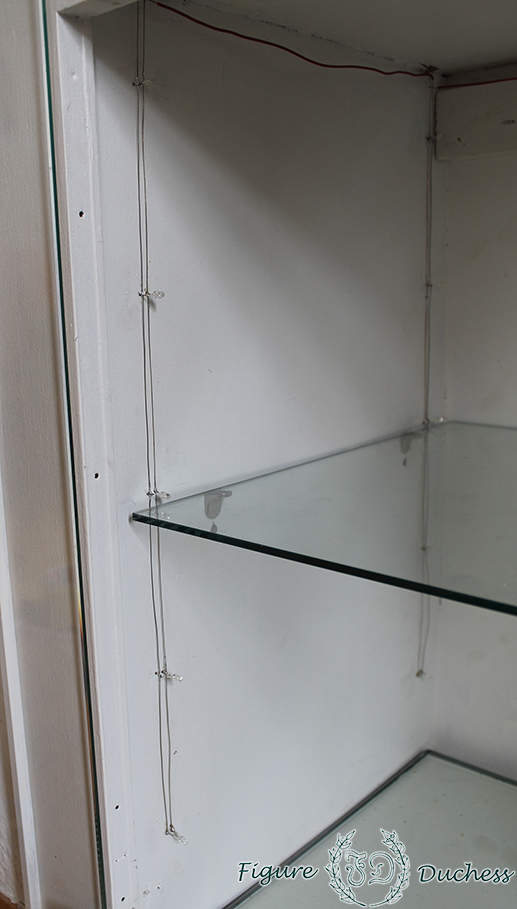
I could reuse the old glass shelves. I merely had to adjust the height of the pins holding them so figures would fit in nicely. Only the doors and glass for the back were missing at that point (oh, and the lighting…)

That’s what the back of the showcase looks like now. This also means that you can have a look from corridor to living room and the other way around!

My bf buildt a metal frame so the edges of the cut-out backboard would look nice. I put silicone on it, which closes up the space between frame and glass. We need to keep out that dust after all. You can also see the finished LED lighting we installed for the showcase, which leads me to…
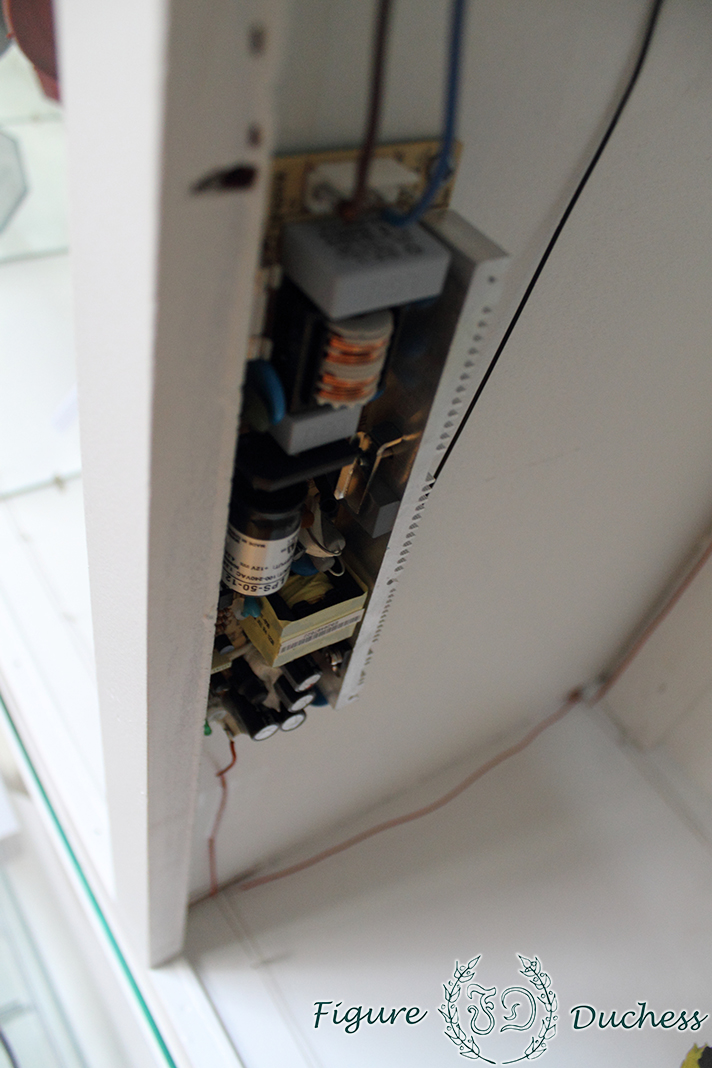
…this little culprit.. If it hadn’t been for this, who would have known if I ever had gotten around to writing this blog entry. Because that asswhaffle up there broke down…which lead to excess voltage…which fried every single LED we had put in this case…. My bf fixed it, so that left me with the job of fixing the LEDs…

Third alternate title “Why the hell did I ever learn how to solder”… This is no fun…. No fun at all! 100 fried LEDs, 100 new ones. You know what that means. Replacing every single on of those had me occupied from 2pm to 10pm, working almost nonstop. My back was killing me.

And that is what that looks like. 100 times… 100 LEDs with 2 pins each equals 200 soldering joints. And don’t you forget about the proper polarity! *sighs*
Not only that! You better make sure that the wires won’t touch or you can do the whole thing again. Sometimes I wonder why we couldn’t just throw in some standard lighting and be done with it…

Work in progress. I worked myself up from bottom to top. There’s cables everywhere and I just noticed that I’m pretty insane having the soldering iron lying on the same shelf as my figures hahaha it’s only heat, what’s supposed to happen *sweats*
Here you can also see what excess voltage did to the old LEDs. The 2 shelves on the top are the old ones, while the rest already have been replaced. The difference in brightness is crazy.

For anyone who’s wondering. I needed the small black lamp because I obviously had to switch off the lights inside the showcase when soldering around and it was getting dark outside.

Aaaaand done! Just had to check up on the voltage to know if the power supply worked properly now and put some glue on some of the LEDs so they’d stay where they should.

My detolf lighting was done the same way btw. We just had to come up with a little contraption to hold the wires. Actually, all of the showcases we own have this kind of lighting system. We put red LEDs into the small showcase for our games, there’s another one in our office and the new figure showcase on the right (can’t see it in the photo) will get the same treatment. Oh boy…. Why the hell did I ever learn how to solder…

it´s amazing how much you have done with all the things you had, it´s really great :D
Thx :D
If it breaks down again, it’s gonna burn xD That’s the 3rd time I had to solder leds into this one…